Personalized Chalkboard Bottle Opener

Standard

Image

Wall mountable (or countertop) bottle openers! Level of difficulty medium-high. Image
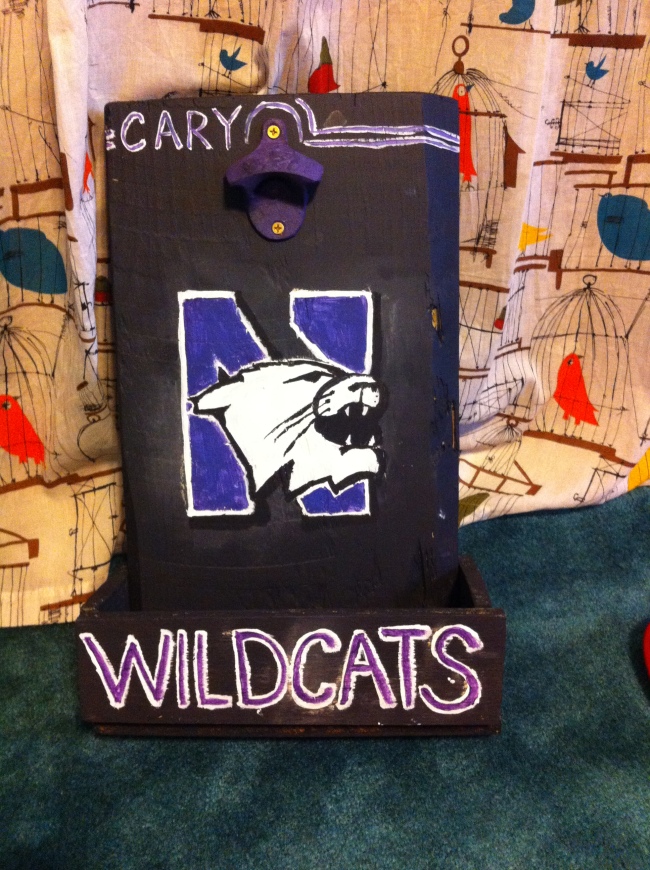


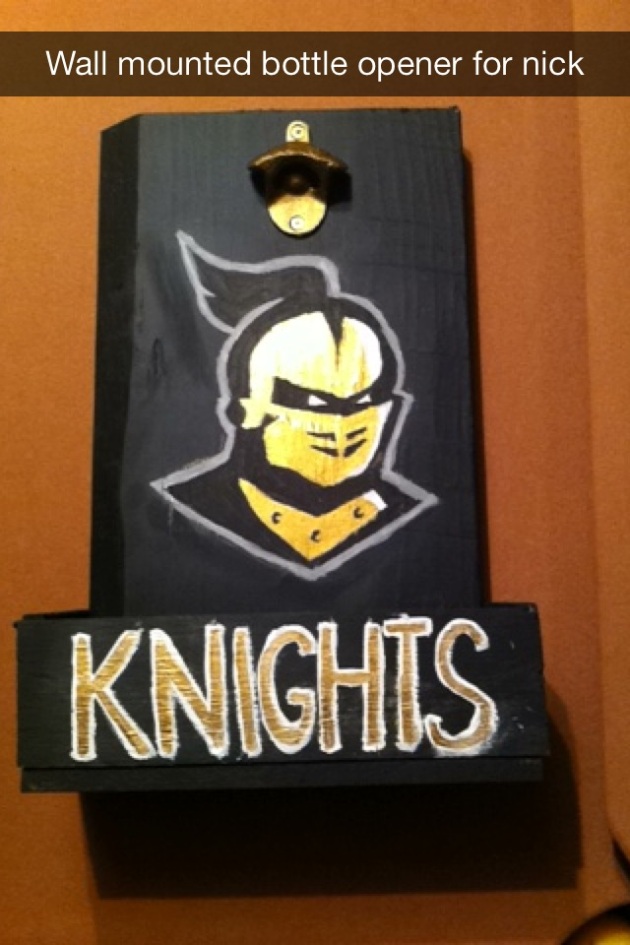
I made these awesome bottle openers for my boyfriend (my UCF Knight in Shining Armor) and my brother, a Northwestern Wildcat alumna. I also made a Duke one for my dad and a Cubs one for my brother in law, but unfortunately, I lost the pictures I had of those.

So here’s how I did it:

Supplies: plank of unfinished wood ($3 – Home Depot), 4x.5″ wood ($2 – Home Depot), cast iron bottle openers ($17 for a 4 pack – Amazon), black chalk board paint ($5 can – Home Depot), acrylic paint ( 79¢ per bottle – Hobby Lobby), large paintbrush (already owned), small detail brushes (already owned), chalk (already owned), wood glue, screws, and poster nails (already owned), circular saw (borrowed), drill (already owned). Total cost of project (for 4) – approximately $50.

  1. Gather your materials. This is a long part since I had to order the bottle openers online. They can also be found on Etsy.
  2. Measure. Mark out  all your cut lines on the wood. An estimation is fine for the planks, but for the 4x.5″‘s you’ll need to measure them to the width of your plank and measure out the desired depth – mine come out 2″ past the plank.
  3. Cut. Carefully, with a circular saw cut all your lumber. Eyewear is very important here. No splinters in eyeballs, please. Also, don’t chop off any fingers.
  4. Paint. Two coats of chalkboard paint on everything. It’ll take a couple hours for each coat to dry.
  5. Draw out your designs. Use chalk or pencil to draw out your designs. I free-handed and used chalk, but if free-handing doesn’t come so easily for you, you can also use tracing paper.
  6. Paint your designs. Here’s where the acrylic comes in. Since you’re painting on black, this will take several coats. Use your own best judgement here and be patient.
  7. Paint your bottle openers. This part’s optional. If you like the cast iron, leave it. If not, paint a few coats and let it dry fully before the next step.
  8. Add your bottle openers. Place the bottle openers where you want them on the plank. Mark where each of the holes are. Drill your holes and then replace the bottle opener and screw it in. 
  9. Attach your cap catcher. This is a tricky step. You have to be very careful to not split the wood with the nails. I had a few accidents myself. I found that you can nail the side pieces and the bottom piece, but that you should glue the front piece. Be very patient for the glue to dry fully or else you will screw it up.
  10. Let everything dry! I can’t impress this enough. Let everything dry between steps and before use so you don’t mess it up. It’s like painting your nails. You want to do something right after, but you can’t or they’ll be ruined.
  11. Drink up!

Beer Bottle Candle Holders

Standard

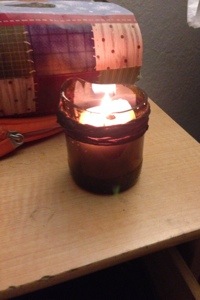
I showed my boyfriend how to cut bottles the other day and I get a text from him with the caption, “I think I made a craft!”

20140302-225814.jpg

Making candle holders from your old beer bottles. It’s so easy, my boyfriend can do it! (Not that he isn’t intelligent. Just not very crafty). I, like many of you, tried many times and failed before I got it though.  Here’s my recipe for success:

What you’ll need: Bottle, yarn, some flammable liquid (rubbing alcohol or acetone work well), a lighter or matches, a sink or bucket, ice.

  1. Attain a bottle. The best way to do this is to enjoy a good bottle of wine or beer.
  2. Gather up your supplies.
  3. Fill up your sink/bucket with cold water. Make it as cold as possible.
  4. Dump ice in your sink/bucket. Make it even colder. Temperature difference is key.
  5. Cut yarn. It should wrap around the bottle about 5 times.
  6. Soak the yarn. Time for that flammable fluid.
  7. Tie the soaked yard around the bottle. Make it tight and straight. Cut the ends close.
  8. Light the yarn. Fire!
  9. Rotate the bottle. Try to make it burn evenly and let it burn until it seems close to going out.
  10. Plunge the bottle in your sink/bucket. It should break right at where the yarn was tied.

The trick I’ve found is to make sure the water is cold enough. Cool water won’t due. The bottle breaks because of the temperature difference. The water needs to be ice cold. Just sand it afterwards and you’re good to go. Happy crafting!

Follow Me On Pinterest!

Rough Waters

Standard

This is a reminder to all you young renters, like me: Know your stuff! I just got a letter from my landlord’s “property management consultant” and he doesn’t seem happy. I’m assuming about me moving out before my lease is up, but since the letter is as vague as it gets, I really don’t know what about! (If you haven’t read my previous post, I’m moving early because the place is a complete nightmare and totally uninhabitable).

What do I do? I research.  

I found on the Florida Bar website a detailed statement of all of my rights as a tenant. I read through and found that my landlord had violated not one, but three of those rights! You renters have the right to…

  1. Private, peaceful possession of the dwelling. That means your landlord can’t just show up without warning.
  2. Working plumbing. (Outhouses don’t count).
  3. Hot water. (At my previous residence with the same Landlord my hot water was out for 2 whole months!)
  4. Heat. Florida isn’t always hot, and when it’s 40 degrees inside your home, like mine was, it is simply uninhabitable.
  5. Structurally sound. Things can’t be falling apart/down.
  6. Have reasonable security. Windows and doors open, close, and lock. Mine don’t…
  7. Free of pests. Biggie here. I have raccoons and termites!

And one more huge  one for my case: “The tenant may terminate the rental agreement if the landlord has failed to live up to one of his or her major obligations, provided the tenant has sent written notice to the landlord, seven days before the rent is due.”

My place is in violation with numbers 4, 5, and 6 on multiple accounts so I have the right to leave. Bam! So what’s my next step?

A well-executed email. I copy-pasted the section of what I needed to prove my case into a document and I went through and annotated. (For those of you who don’t know how to annotate on a word processing document, it’s pretty simple. Just highlight and click add comment.) I highlighted each section I believed was important with a comment stating my specific complaints. I then wrote a very clear and concise email—I made sure to include everything I wanted to know and everything he would need to know and wrote it in a way that was firm but not angry-sounding. I then re-stated my intention to move out, ended by saying that I hoped to hear back soon, and attached my annotated proof.

We’ll see where this leads me. But at least now I know my rights fully! And I hope you do too!

744.5

Standard

My current apartment is a nightmare. I live at a half address—the back porch of what has the potential to be a quaint 1920’s home in the historic district of Lakeland, FL. The apartment is under 400 sq ft, has termite frass falling from the ceilings (that’s euphemism I found on the pest control website for bug poop), and provides shelter to a family of raccoons who come out from under the house to stare at me from behind their creepy little masks every time I step outside. When it’s cold outside my home, it’s even colder inside due to the half inch gap between my door and the frame, and to make matters worse, I have no heat, which isn’t too uncommon in Florida, but on those nights that it dips below 40, I’m stuck wearings two pairs of socks in my kitchen. I could write an essay on all the problems I’ve had with this apartment, but it really was the perfect little craphole to spend my last years of college. Now that I’ve graduated, I’ve decided it’s fine time to graduate to a better apartment too.

I shopped around for my new home, keeping in mind all the what-not-to-look-for’s I learned the hard way, and I found a new place in downtown Orlando. It’s a 640 sq ft condo (comparably spacious) in a beautiful mid-rise apartment building, just a 9 minute walk from the nearest bar—perfect for a lush like me, and a 5 minute drive from my parents—a nightmare for some, but a definite plus for a family-girl like me, and it met every one of the items on my well-prepared checklist:

  1. Washer and dryer in unit
  2. Dishwasher
  3. Disposal
  4. Electric oven
  5. Sunroom (for my painting studio)
  6. Bar-top dining
  7. Walk-in closet
  8. 24 hr fitness room (with a bench press!)
  9. pool
  10. SAFE!

It even had a few extra awesome perks like granite countertops and hardwood floors and free wifi throughout the entire building. Literally my vision of my new, grown-up apartment. The kicker—rent is double what I pay right now. So my plan, and this blog, will be to make this place a dream and to do it on a tight budget. Bring it on!

This is the kitchen of my current apartment. Quirky, cute, and barely functional.

This is the kitchen of my current apartment. Quirky, cute, and barely functional.

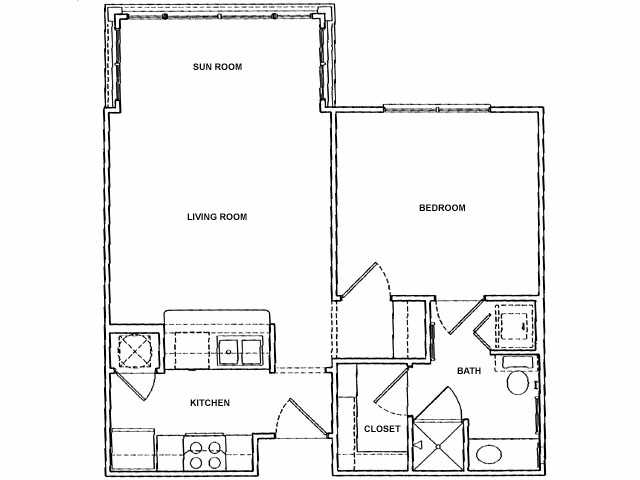
And here's the floor plan for my new apartment.

And here’s the floor plan for my new apartment.